Showing posts with label cupcakes. Show all posts

Friday, February 28, 2014

Baking Exploits in Italy...

If you know me, or have read through some of the posts from last year then you know that I really like baking. I enjoy making desserts, even though I'm not a particularly precise person. I use recipes and then completely change things as I go even when baking.  It's supposed to be the science of cooking, and is, but I still like to tweak and play.
That being said, I haven't baked in ages.
I tried baking cupcakes back in December but sadly they didn't come out as well as they could have.  I had a couple of problems to contend with. The main issue was ingredients. Since Italians aren't big cake bakers (they're great with desserts and pastries but don't make fluffy cakes and cupcakes like we make in the States) I had a hard time finding the right kind of baking powder and baking soda. Vanilla comes in powder form, unless you go to specialty shops. Brown sugar here is not brown sugar but cane sugar, so it is darker in color but not finely ground. It doesn't pack well and therefore changes the texture of any cake or cookie that calls for it.
Ingredients were a slight problem, and so was measuring. I didn't own a measuring cup here because a measuring cup here doesn't measure cups but milliliters.  I didn't feel like taking the effort to convert my recipes into Italy appropriate measurements  so I just used a drinking glass to measure... Yes, so this doesn't really work.
Anyone with half a brain, probably wouldn't have tried to make it work but I'm a little insistent on doing things my way.
My chocolate chip cupcakes were edible but they weren't quite right either. They didn't rise the right way and certainly didn't get fluffy like I wanted.  No one complained, so I suppose they were good, but I wasn't happy with them.
I wanted to try again, but then th eoven broke.  Ok, not quite the oven, just the dial.
That being said, it took over a month for it to get fixed. I live in Italy after all.
So I had bought new pans, measuring cups and spoons and I couldn't bake until last night!
I finally got to bake something successfully last night.
My student gave me lemons from her garden so I decided to use them to make lemon squares for the
first time ever.  I looked up a bunch of recipes before getting the oven fixed which was quite comical. I looked up No Bake Lemon Cake and No Bake Lemon Bars and for some reason Yummly (a recipe search engine) linked me to a bunch of recipes that definitely required baking.
I was a little confounded but in the end it was fine, because I found 2 recipes that seemed great for when I got my oven back. Luckily, we got a new dial Wednesday morning so yesterday evening after work it was time to try some baking.
I'm going to have to post the recipe later on because my lemon squares came out wonderfully. Sweet, moist and gooey.
I made 2 batches and I was ridiculously pleased with both!
my beautiful lemon squares

Saturday, October 5, 2013

Recipe: Apple Cupcakes with Maple Butter and Fresh Whipped Cream

I went apple picking last Saturday! It was a lot of fun but at first I wasn't sure what to do with the sheer quantity of apples I picked.
I finally decided on what to make with my apples. I settled on apple cupcakes because I've never made them before and I always enjoy a challenge and trying new things.  Frosting wise I decided to use the maple butter that I bought in Canada this summer and then I'll top that with a dollop of fresh whipped cream (yes, I know I'm obsessed with it... in fact I should probably have a blog that talks just about whipped cream).
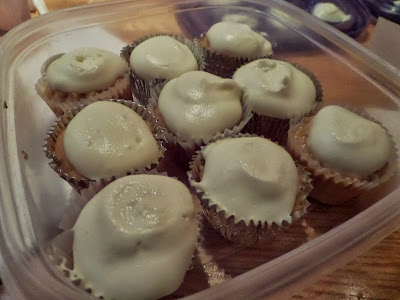
mini cupcakes with maple butter and fresh whipped cream
Ingredients:
2 1/2 cups flour
2 tsps baking powder
1 tsp fine salt
1/2 tsp cinnamon
1/2 tsp ground nutmeg (or ginger)
8 tbs unsalted butter (1 stick) at room temperature
1 cup granulated sugar
1 cup light brown sugar
1 tsp vanilla extract
2 large eggs
3/4 cup heavy cream
4 medium baking apples (I used a selection of apples from when I went apple picking this weekend)

Preheat the oven to 350°F. I made a tray of regular sized muffins and a tray of mini muffins. I had extra batter, so I also made 3 additional regular sized muffins.
Combine the flour, baking powder, salt, cinnamon and nutmeg in a medium bowl. Mix together to break up any lumps and put to the side.
In another bowl, mix the butter with a electric mixer on a medium-high speed for about 2 minutes.
apple batter!!
Add the sugar and vanilla and continue beating until the mixture is smooth.  Add in the eggs one at a time. Mix until well blended for about a minute.
Line the muffin tins and then fill until about 3/4 full.  Tap the tin to make sure there are no air bubbles.  Bake until a toothpick inserted into the center of the cupcakes comes out clean or until the top is nicely golden. Rotate the pans about halfway through the baking time. My oven needed about a half hour for the cupcakes to be fully cooked.
Remove the cupcakes from the pans and let cool completely before frosting.

Oh my goodness... Just delicious!


Thursday, August 29, 2013

4 Days of Food in Wisconsin and Chicago

Well, this post is long overdue...  I went to Wisconsin and Chicago at the end of June for a wedding. It was a fantastic weekend filled with friends, laughter, lots of entertainment and some absolutely fantastic food.
The various cheese curds found in Milwaukee Public Market
I had never been to Wisconsin or Illinois before so I was super excited to try some of the traditional delicacies of the area.  When I asked my niece, nephew and half brother what you eat in Wisconsin they all said that we needed to try cheese curds.  But specifically we needed to try good cheese curd, that squeaks when you chew. It sounded a little strange to me honestly, but I'm willing to try anything once.
I tried 4 different kinds of cheese curd over the course of 3 days.  The first night we got a bag of mozzarella and cheddar cheese curd from Walmart (I know, I know, classy...).  They were pretty darn good, but didn't quite squeak the way everyone said a really good cheese curd should. So we kept trying.
The next day, in Milwaukee proper, we went to the Milwaukee Public Market where I found amazing cheese curd in different flavors. Plus so much more.
I was fascinated by the Public Market because it reminded me of the food markets in Florence, right near San Lorenzo and also San Ambrosio. It was fantastic. The first floor had countless small vendors of different Midwest specialties. Everywhere I turned there was something different and interesting to try. There were coffee places, cheese vendors (sooo many cheese vendors!), wine vendors, sandwich shops, an olive oil vendor and plenty of seafood options (which I thought was a little funny considering Wisconsin is no where near the ocean but  they are on a lake.. so maybe they had a lot of freshwater options...).
Love the cows!

There were so many great things to see.  I loved the cheese formed into different shapes, like cows and footballs. I tried some different cheddars and mozzarellas and it was all delicious.  I really did like the cheese curds. They were surprisingly good.

Olive oil galore

I also really enjoyed the Olive oil place, but I'll do a whole separate post on that as well.  I wish we had been there even longer because there were so many things I would have like to try, but I guess they'll have to wait till next time.
After the market we wandered around Milwuakee and the music festival before we headed over to meet our friends at a fantastic restaurant near the public market.  It was caled the Wicked Hop and I liked it so much that I did a separate blog just for it!  If you're curious, read my Review here.
We were pretty stuffed from the Wicked Hop so dinner was more cheese curd on bread with some tomatoes (basically snacks that we'd gotten for the road trip).


The next day was the wedding. It was outdoors and bbq style. The food was delicious and fresh: I loved that they chose to grill for some homey goodness. They had all sorts of fresh vegetables like squash and asparagus and the meats were grilled to perfection as well.


But by far my favorite thing at the wedding were the cupcakes!  They were delicious in several different flavors.  There were red velvet (my absolute favorite), carrot cake, caramel apple and a regular vanilla cake. I tried all of them except for the carrot cake (by the time I wanted one, there were none left!). The cake was moist and delicious and the fillings were sweet but not generally overpowering. I loved the red velvet and the plain vanilla but the caramel apple was a little too sweet for me.  Next time I'm in Wisconsin I need to find out where they got them because they were quite delicious.

Me enjoying my red velvet!!

The next morning we went off to Chicago where we got to experience even more great food.  I can't wait to go back to try even more since we were there for just the one and a half meals.  Some of the big specialties in Chicago are Chicago style hotdogs and deep dish pizza. I didn't get to try a hot dog but I did get to try my first ever deep dish pizza.  I love pizza and I really enjoyed the deep dish.  From what my Chicago friend told me, there is even better deep dish pizza than what I ate. I got my deep dish at a slightly fast food-esque place down at the pier so it certainly wasn't 5 star quality. But I liked it a lot and I'll definitely try it again. I wish I had taken a picture (and I could have sworn that I had, but I can't find it). My pizza had jalapenos, cheese, bacon, peppers and spinach on it and I loved it!
Later on in the evening, we found a great little brewery while we were waiting for the train. We missed one by ten minutes and therefore had an hour to wait. We found the Haymarket Pub & Brewery which was a ten minute walk from the station.  It was a great spot with a lot of great drink options so wrote a Review about it.


So that was our Adventure in the mid-west.  There wasn't quite as much food as I would have liked but it was a fun trip with some new flavors.  I can't wait to get back to that region to try even more good stuff.


Wednesday, August 28, 2013

Recipe: Chocolate Raspberry Cupcakes with Fresh Raspberry Whipped Cream

More Cupcakes!!
I know! I need to start sharing recipes for other things, but I happen to do cupcakes really well. Plus, I get a lot of cupcake requests so I keep making them. :D I will, however, try to post up other recipes soon.

Ingredients:
1 1/4 cup flour
1/2 tsp baking powder
1/2 tsp salt
1/3 cup chocolate almond milk
1-2 tsp vanilla extract
6 tbs butter, room temperature
1/2 cup light brown sugar
2 large eggs
1/2 package fresh raspberries, halved
1/4 cup freh raspberry puree
3 tbs cocoa powder
1/4 cup chocolate chips

Delicious! They had a really nice almost brownie-like richness!

Preheat oven to 350 °. Sift the flour, baking powder and salt together. In a separate bowl, when the butter is room temperature, beat it and the sugar until pale and fluffy. Continue mixing and beat in 1 egg at a time followed by the vanilla. Then slowly add in the flour alternating with the chocolate milk and then the raspberry puree. Then carefully stir in the raspberries.
Line a muffin tin and drop in about 3 tablespoons of batter.  Top each cupcake with chocolate chips. Bake for about 20 minutes or until a toothpick comes out clean. Let cool in tin.
Served with fresh Raspberry whipped cream

It only made 12 cupcakes so I think for next time I'll double the recipe. They came out rich and not too dense and the whipped cream was utterly perfect.

Whipped Cream
1 cup heavy cream
3 tbs brown sugar
10-15 fresh raspberries, pureed or 2 tbs raspberry jam

Whenever I make whipped cream, I freeze a metal bowl for about ten minutes. It really helps the cream get to stiff peaks quickly.
First, whip the cream and sugar together. Then as your cream comes to soft peaks slowly begin to pour in the pureed raspberries. If you find that your raspberries are a little sour, add in tsp or so of regular sugar. If you don't have fresh raspberries, you can also use jam and then you can cut out most of the sugar.

Wednesday, August 7, 2013

Recipe: Mini Chocolate Pear Cupcakes

So, I haven't written a blog in ages and I miss it!  I miss writing about food, taking pictures of food, cooking new and unique things.
Earlier today a couple of my high school students (for anyone who doesn't know, I tutor kids English) started asking if we could have a party for their last day of summer school with me... Now, I have no intention of letting them party when we have to talk about the last chapters of Huckleberry Finn, however, I did allow them to convince me to bring them party food.  As a result I've been baking happily for a few hours.  I decided to make Mini Peach Cupcakes adapting my Nectarine Raspberry Cupcake Recipe as a base.
I also decided to please the chocoholic in me by creating a new chocolate cupcake also using the same recipe base since I like the consistency. Ever since Italy I have been fascinated with the combination of chocolate and pear so I decided to try the combination myself.
I went for the mini cupcake so I can feed more of my students but this recipe should absolutely work with regular sized cupcakes as well.

Ingredients:
1 1/4 cup flour
1/2 tsp baking powder
1/2 tsp salt
1/3 cup milk (preferably whole milk)
1-2 tsp vanilla extract
6 tbs butter, room temperature
1/2 cup sugar
2 large eggs
1 medium pear, peeled, deseeded and finely chopped
3 tbs cocoa powder
1/4 cup chocolate chips

Preheat the oven to 350°. Sift the flour, baking powder, and salt together. In a separate bowl beat the butter and sugar until it is pale and fluffy. Make sure the butter is room temperature! It makes this step so much easier. Continue mixing and beat in 1 egg at a time followed by the vanilla. The slowly add in the flour alternating with the milk. I actually decided to add another 1/4 cup of milk because it was feeling a little too dry since it's so hot outside.  Stir in the pear and chocolate chips gently.
Line a mini muffin tin (or regular muffin tin). Bake for about 20 minutes or until a toothpick will come out clean.  Let cool in tin.


Sunday, June 23, 2013

Recipe: Nectarine Raspberry Cupcakes

I bought some beautiful nectarines the other day and started wondering if I could turn them into cupcakes!  I adapted a Martha Stewart Nectarine Cupcake Recipe. I was actually quite surprised to find a recipe for cupcakes with fresh nectarines, for some reason, I only expected to find recipes involving peach.  I didn't find many involving nectarines, but this one looked good so I took it and adapted it to what I had in the kitchen.

Ingredients:
1 1/4 cup flour
1/2 tsp baking powder
1/2 tsp salt
1/3 cup milk (preferably whole milk)
1-2 tsp vanilla extract (for me, more is better)
6 tbs butter, room temperature
1/2 cup sugar
2 large eggs
2 medium nectarines, peeled, halved, pitted and finely chopped (which should be about 1 1/4 cup)
1 small container raspberries, cleaned and halved

Preheat the oven to 350°. Sift together the flour, baking powder and 1/4 tsp salt. In a separate bowl beat the butter and sugar until pale and fluffy. Continue mixing and add in 1 egg at a time followed by the vanilla. Then blend in the flour mixture alternating twice with the milk. Stir in the nectarines and raspberries gently.
Line a muffin tin with baking cups and fill each with about 3 tablespoons of batter. Bake for about 25 minutes or until the edges begin to turn golden.  Let cool in tin.


I topped mine with fresh whipped cream and thin nectarine slices.  I think I may try this recipe again and use peaches, plums or apricots.  I lean towards apricots because they are scrumptious and I think will go nicely inside a cupcake.

Monday, April 29, 2013

Recipe: Chocolate Chip Strawberry Cupcakes with Fresh Whipped Cream

So I've been trying to get around to baking for weeks now but something always seems to get in the way. Either work, or outings, or karaoke, or exhaustion...
I told myself I was going to bake on Sunday no matter what, and then Sunday got here, and well... I almost didn't bake!  I went to the Brooklyn Botanical gardens to see the Cherry Blossom Festival and by the time I got home it was after 6pm...
I lazed on the couch reading and texting with a friend... I kept saying I was going to bake, but I wasn't feeling particularly motivated.
However, I have promised a lot of cupcakes over the last few weeks, sooo at around 8pm I searched for a new and fun recipe to use. I found Strawberry Cupcakes with Strawberry Meringue Frosting. It looks like a good recipe adapted from something in a Martha Stewart Cookbook. I then had to further adapt it because I was missing a couple of ingredients and the stores were already closed when I noticed.
I got around to putting the mix together around 1 and then baked Monday morning.
There is no explanation for my laziness but I just could not pull myself together to finish baking Sunday night. Luckily I woke up and finished everything Monday morning!
These can be served with or without a frosting because they are super flavorful.

Chocolate Chip Strawberry Cupcakes
3 cups flour
1 tbs baking powder
1 tsp salt
1 cup unsalted butter, at room temperature
2 cups sugar
1 1/2 tsp vanilla extract
3 eggs
1 egg white
1 cup almond milk
2 cups finely chopped fresh strawberries
1 cup chocolate chips

Preheat the oven to 350° and line your cupcake tins.  The recipe should make 34 cupcakes.

Whisk together the flour, baking powder and salt, and then put to the side.

In another bowl with an electric blender, cream together the butter, sugar and vanilla extract. Blend for about 3 minutes or until the mixture is pale and fluffy. Then add the eggs and egg white, one at a time, beating until each one is fully incorporated. Add the flour in two batches, alternating with the almond milk. (I actually wasn't paying attention and added all of the milk before the flour... I think it does change the consistency, as does the almond milk I used).
At this point, use a spatula to fold in the chocolate chips and strawberries. I waited till the next morning to chop the strawberries and add them into the batter because it had gotten too late. I was able to fill 34 liners.
Bake for about 25 to 30 minutes and voilaaaa.
                                        YUMMY CUPCAKES
Fresh out of the oven!

I chose to make a simple whipped cream. Just 2 cups of heavy whipping cream, 2 tbs brown sugar.  I made sure the cream was very cold andd so was the container that I whipped it in.

I served half with whipped cream and half without, and they were delicious both ways!


Friday, February 15, 2013

Recipe: Updated Valentine's Day Chocolate Russian Cupcakes


For the Superbowl I made White Russian Cupcakes with Espresso Whipped Cream , but for as good as they came out, I wanted to try one more time and tweak. I wanted to get a fluffier cupcake and since it's Valentines Day I decided to add some chocolate!


Chocolate Russian Cupcakes:
1 1/2 cups flour
2 tsps baking powder
1/4 tsp salt
3/4 cup sugar
6 tbs unsalted butter, softened
3 large egg whites
2 tsp vanilla extract
1 oz Vodka (preferably Vanilla Vodka)
1/4 cup espresso
1/2 cup bailey's coffee creamer
2-3 tbs coccoa powder

Preheat the oven to 350°F and line a cupcake pan. The recipe makes around 16 cupcakes.
Sift the flour, baking powder (hint: be generous with your teaspoons), coccoa powder and salt into a large bowl and set aside.
In a bowl, use a hand mixer to whip the eggwhites to soft peaks. Don't overwhip and put to the side.
In another bowl cream the butter and sugar. Add in the vanilla, vodka and coffee and mix until smooth. Blend in the flour mixture in three additions, alternating with the bailey's cream. Start and end with flour. Once well incorporated, put your hand mixer away. Gently fold the egg whites into the rest of the batter using a rubber spatula.
Bake for 20 minutes or until a toothpick comes out clean. Cool completely before icing.

They came out a lot fluffier this way and I really enjoyed the hint of chocolate. For frosting, I made the same espresso whipped cream, but did it in larger quantities, meaning I frosted every single cupcake this time.  :)

Espresso Whipped Cream
2 cups whipping cream
6 tbls brown sugar
2 tsps vanilla
4-8 tbls espresso

Whip the cream and brown sugar until you get still peaks (this will take considerably longer than if you whip only one cup at a time). Fold in the vanilla and espresso gently.

Then for toppings, I made (successfully this time!) red glitter sugar.  I took about a quarter cup of sugar (I didn't properly measure) and mixed it with 3 drops of red food coloring. Then I baked the red sugar for about 10 minutes at 300°F, checking on it ever few minutes.  If it over heats you wind up with colorful caramel rather than glitter sugar.  So watch out!
Then after frosting, I sprinkled the cupcakes with the sugar and voila, Valentines day cupcakes! Beautiful and tasty.


Sunday, February 3, 2013

Recipe: Beer Cupcakes with Chocolate Beer Frosting and Caramel Bacon

Ok, so for the last batch of cupcakes I definitely cheated.... I had to! I got tired lol... So I used a cake mix and just adjusted the recipe.

I used a box of Pillsbury White Cake. Rather than using a cup of water as called for on the box, I used 1 cup of High Life Miller Life. I also added a teaspoon of orange zest.
Then I followed the rest of the directions.

I pulled them out of the oven and then brushed them with a little more of the beer.

Once they cooled, it was time for frosting.

Chocolate Beer Butter Cream:
1 stick butter (room temperature)
3 tbs cocoa powder
1 cup powdered sugar
3 tbs beer, poured and settled before being measured out
1 tsp salt

Beat the butter until smooth for about 2 minutes. Slowly add in the sugar, cocoa powder, beer and salt. Beat for about 5 minutes.

Frost and eat.

Or you can make caramel bacon as a garnish.


Caramel Bacon: 
1/2 cup caramel sauce (either bought or homemade)
1 tsp paprika
bacon

Cut your bacon into 1/2 inch pieces. Mix the caramel and paprika together. Coat each piece of bacon and then lay on a baking sheet. Bake for aout 20 minutes or until crisp.

Place a couple of pieces on each cupcake and serve.


Eat and enjoy!! I was seriously surprised at how good these are!  The caramel bacon is SOOO delicious!

And that's what I'll be enjoing for the superbowl.

-Raspberry Truffle

Recipe: White Russian Cupcakes with Espresso Whipped Cream

Game Day Cupcakes number 2!

I had Bailey's coffee creamer in my fridge so the first thing that came to mind was a White Russian. A White Russian is generally made with Bailey's, vodka and cream.. so I guess I really made a Black Russian since Black Russians involve coffee.

I found a recipe online and then proceeded to tweek it based on what I had in the house. I have to say, they came out really good!

White Russian Cupcakes:
1 1/2 cups flour
2 tsps baking powder
1/4 tsp salt
3/4 cup sugar and 1 tsp sugar
6 tbs unsalted butter, softened
1 large egg
2 large egg whites
2 tsp vanilla extract
1 oz Vodka (preferably Vanilla Vodka)
1/4 cup espresso
1/2 cup bailey's coffee creamer

Preheat the oven to 350 °F and line a cupcake pan. The recipe should make about 15 cupcakes.
Sift the flour, baking powder and salt into a large bowl and set aside. In a separate bowl use a hand mixer to beat together the sugar (excluding 1 tsp) and butter until combined. Beat in the egg white and then add the Vanilla, Vodka and coffee.
Add the flour mixture in three additions and alternate with the bailey's cream. Begin with the flour and end with the flour.
In a separate bowl, whip the egg whites with a tsp of sugar until they form soft peaks. Gently fold into the rest of the batter.
Bake for 17-20 minutes or until a toothpick comes out clean. If desired, while the cupcakes are still warm, brush them with a small amount of espresso. Cool completely before icing.


Espresso Whipped Cream
1 cup whipping cream
3 tbs brown sugar
1 tsp vanilla extract
1-2 tbs espresso

Whip all of the dry ingredients together until you reach the soft peak stage. Fold in the vanilla extract  and espresso carefully.
Here are all the cupcakes! The ones in the center have the Espresso cream. It's sooo delicious!

Apparently there is a way to stabilize your whipped cream! I haven't tried it yet, but it would be really helpful.
 For 1 cup of cream, use 1/2 tsp of plain gelatin soaked in 1 tbs water. Dissolve thoroughly over heat and then add the melted gelatin while whipping the cream. Stop when you get soft peaks.

-Raspberry Truffle


Recipe: Honey Whisky Chocolate cupcakes with Honey Buttercream

I don't watch football regularly. It's not my sport (to say the very least). Honestly, for as un-American as I may sound, I really, really detest football.  But the Super Bowl is a great occassion for a party. It's a great time to gather with friends, goof around and most importantly eat. So when my friends invited me over, I quickly asked if I could bring dessert.

Well, that was a couple of weeks ago and the Super Bowl is today. It took most of yesterday but I finally figured out what dessert to bring. There are a lot of dessert options out there so I definitely had a hard time deciding what would fit best at a Super Bowl party. I decided to skip cake, because it seems like a more formal, sit down dessert. You have to cut it, and serve people... Definitely too much hastle at a party where most eyes will be focused on a tv screen. And then there are cookies but those are FAR too easy to eat by the hundred. Macarons felt too formal, ice cream too much of a pain to make and so forth and so on.

In the end, I decided to make cupcakes because you can decorate them beautifully but they're handheld and easy to pick up and go.
Then I had to figure out what KIND of cupcake to make... That took a while to figure out because again way too many options and I'm just not decisive enough. I decided to go with something that reminded me of football.... Liquor became my theme.

My first cupcakes were these:


Honey Whisky Chocolate Cupcakes:
1 1/4 cup all purpose flour
1/3 cup cocoa powder
1 cup granulated sugar
1 tsp baking soda
1/2 tsp baking powder
1/2 tsp salt
1 egg
1/4 cup espresso (cooled)
1/4 cup whiskey
1-2 tsp honey
1/2 cup vanilla greek yogurt
1/4 cup vegetable oil

Preheat oven to 350°F

In a large bowl, combine all of the dry ingredients. In another bowl, combine the egg, coffee, whiskey, yogurt and oil. Carefully sift the flour mixture into liquid. Combine until smooth.

Pour the mixture into your 12 prepared cupcake liners. They should be about 3/4 of the way full.
Lower the heat to 325°F and bake for 18-20 minutes or until a tooth pick comes out clean.

Cool completely before frosting.

the perfect consistency

Honey ButterCream:
2 sticks butter
1 1/2 cups powdered sugar
3 tbs honey

Cream the butter with a small blender. Carefully add in the powdered sugar and once smooth blend in the honey.

Refridgerate until you're ready to frost!

There are a couple of easy ways to frost.

  1. The slather method; take a spoonful of frosting and spread it with a knife.
  2. The piping method: take a plastic ziplock bag (bigger is better, otherwise you'll just make a mess) fill it with your frosting. Cut off one bottom corner. Your ready to frost. I chose to pipe in a circle, but the "pastry bag" really allows you to get creative. 


And that was cupcake number 1! I made two other kinds as well!

-Raspberry Truffle

Thursday, January 31, 2013

Recipe: Semi Homemade Chocolate Covered Strawberry Cupcakes with Strawberry Creamcheese Frosting


I've been trying to figure out what dessert I should make for Valentine's Day. I don't have a Valentine but I think it'll be fun to bring a little treat to the girls I work with. There are really quite a few options for pink and red desserts for the holiday but I started flipping through my old pictures and found these. Chocolate covered strawberry cupcakes with strawberry cream cheese frosting. It brings in the colors and flavors that make me think of heart day.

I made these originally for my birthday way back in September. I made red velvet cupcakes from scratch and then didn't feel like searching for a chocolate cake recipe... I know, really lazy... But I cooked my entire birthday dinner by my lonesome, so I figured one set of cupcakes with a shortcut wasn't that bad.
Luckily, we had a box of dark chocolate cake mix, so I started with that.

I decided that I wanted to use the combination of chocolate and strawberry and made a Chocolate covered strawberry cupcake with a creamcheese frosting (which was easy since I was already making cream cheese frosting for the red velvet).

So here's my semi-homemade recipe:

For the cupcakes:
1 box of chocolate cake mix and all the ingredients indicated by the box.
12 small to medium strawberries, cleaned with tops removed

Preheat your oven to 350°F and follow the directions of your boxed mix.  Line your muffin tin with your choice of liner (maybe fun hearts for Valentines Day). Fill them about 3/4 of the way fill and pop a strawberry into each. Lower the heat to 325°F and pop your cupcakes into the oven for between 20-25 minutes or until the chocolate has set. The strawberries will cook down into an almost syrupy consistency.
Put them to the side to cool.
Let them cool fully before frosting.

For the frosting:
1/2 cup margarine (room temperature)
1 (8-ounce) package cream cheese (room temperature)
1/4 to 1/2 a box confectioners' sugar (depending on your taste), sifted
4-5 medium strawberries, cleaned and then pureed.
1 teaspoon vanilla

Cream the margarine and cream cheese with an electric blender. Then add the sugar a little at a time. Be careful, this can get messy if your not careful (this I know from experience)!Mix in the vanilla. At this point you could put the frosting into the fridge and use as a regular cream cheese frosting. It's quite delicious.
If you want a strawberry frosting, blend in the strawberry puree now.
I like to put the frosting into a ziplock bag, cut of the tip and decorate the cupcakes with a large swirl pattern. For the strawberry frosting, make sure you refridgerate for at least a half hour before decorating.
Forgive the messy frosting! I should have let the frosting sit in the fridge for at least a half hour before  decorating. 
Mine came out a little messy, but they were delicious and moist and a big crowd pleaser.

-Raspberry Truffle

Friday, October 26, 2012

Recipe: Chocolate Chip Red Velvet cupcakes


I absolutely love Paula Deen and I love her recipe for Red Velvet Cake. It comes out wonderfully moist and delicious. Here's my version as cupcakes with chocolate chips and a cream cheese frosting!


Homemade Chocolate Chip Red Velvet Cupcakes before frosting
For the Red Velvet Cupcakes:
2 1/2 cups all-purpose flour
1 teaspoon baking soda
1-2 tablespoons of semi-sweet cocoa powder
1 1/4 cups granulated sugar
2 eggs
1 1/2 cups olive oil (or another lighter oil such as canola or sunflower oil)
1 teaspoon apple cider vinegar
1 (1-ounce) bottle red food coloring (but you only need a few drops)
2 teaspoons vanilla
1 cup buttermilk
1/2 a package of semi sweet or dark chocolate chips

For the cream cheese frosting:
1/2 cup margarine
1 (8-ounce) package cream cheese
1/4 to 1/2 a box confectioners' sugar (depending on your taste), sifted
1 teaspoon vanilla


For the Red Velvet Cake:

Preheat oven to 350 degrees F. Line your cupcake tins.

Cream the sugar and eggs together in a large bowl.

Sift the flour, baking soda and cocoa into the sugar and egg mixture. As far as I'm concerned, the more cocoa you add, the better the cupcakes will taste and the darker your red velvet will look (I've occassionally been so overzealous that my red velvet has wound up simply looking like chocolate cake).

In a separate bowl mix the oil, vinegar, food coloring (add until you get the desired redness, remembering that the coco will later make it appear richer), and vanilla together. Add slowly to the other bowl along with the buttermilk, beating continuously until well blended. Blend in the chocolate chips. The more the better!

Once smooth with no lumps, pour the batter into the cupcake tins about 3/4 of the way full. Tap to even out the batter and release air bubbles. Bake for about 20 minutes or until a toothpick comes out clean.

Cool completely before frosting.

For the frosting:
Cream the margarine and cream cheese well when at room temperature. Add sugar and beat until mixed but not to the point that it loses its shape. Mix in the vanilla and put in the fridge until ready for use. I like to put the frosting into a ziplock bag, cut of the tip and decorate the cupcakes with a large swirl pattern. Sprinkle the finished cupcakes with a light dusting of cocoa powder.

Sunday, August 9, 2009

Brownies, mmm mmm good

oh yes there will be brownies today... I need to bake so I can work... strange right?? lol it functions though
post yummy brownie pics later though!....
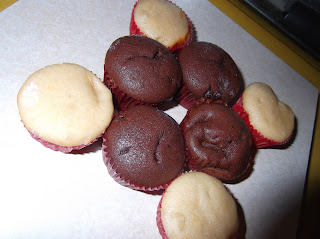
soo forgot to take brownie pix... these are red velvet cupcakes!! even better lol!!


~raspberry truffle